1. Pambuka
This manual provides essential instructions for the safe and efficient operation of your Lane PMX-402DU Professional Stereo Power Mixer. Please read this manual thoroughly before using the device to ensure proper setup, operation, and maintenance. Retain this manual for future reference.
2. Pandhuan Safety
Kanggo nyegah kejut listrik, geni, utawa karusakan ing unit kasebut, tindakake langkah-langkah safety ing ngisor iki:
- Sumber Daya: Sambungake unit mung menyang vol AC sing ditemtokaketage as indicated on the rear panel. Ensure the power cord is securely plugged into a grounded outlet.
- Banyu lan Kelembapan: Aja mbabarake unit menyang udan utawa kelembapan. Aja nyelehake barang sing diisi cairan, kayata vas, ing unit kasebut.
- Ventilasi: Ensure adequate ventilation. Do not block ventilation openings. Install the unit in a location with proper airflow to prevent overheating.
- Sumber panas: Aja nyelehake unit ing cedhak sumber panas kayata radiator, register panas, kompor, utawa piranti liyane (kalebu ampliifiers) sing ngasilake panas.
- Layanan: Do not attempt to service this unit yourself. Refer all servicing to qualified service personnel. Opening the unit may expose you to dangerous voltages utawa bebaya liyane.
- Reresik: Copot unit saka stopkontak sadurunge ngresiki. Gunakake gombal garing mung.
- Overloading: Aja kakehan stopkontak utawa kabel ekstensi amarga iki bisa nyebabake risiko geni utawa kejut listrik.
AWAS: RISIKO KEJUTAN ELEKTRIK. AJA BUKA.
Simbol iki nuduhake anané vol mbebayani uninsulatedtage within the product's enclosure that may be of sufficient magnitude to constitute a risk of electric shock.
3. Produk Liwatview
3.1. Front Panel Controls and Connectors
The front panel provides access to all input channels, main output controls, effects, and the graphic equalizer.
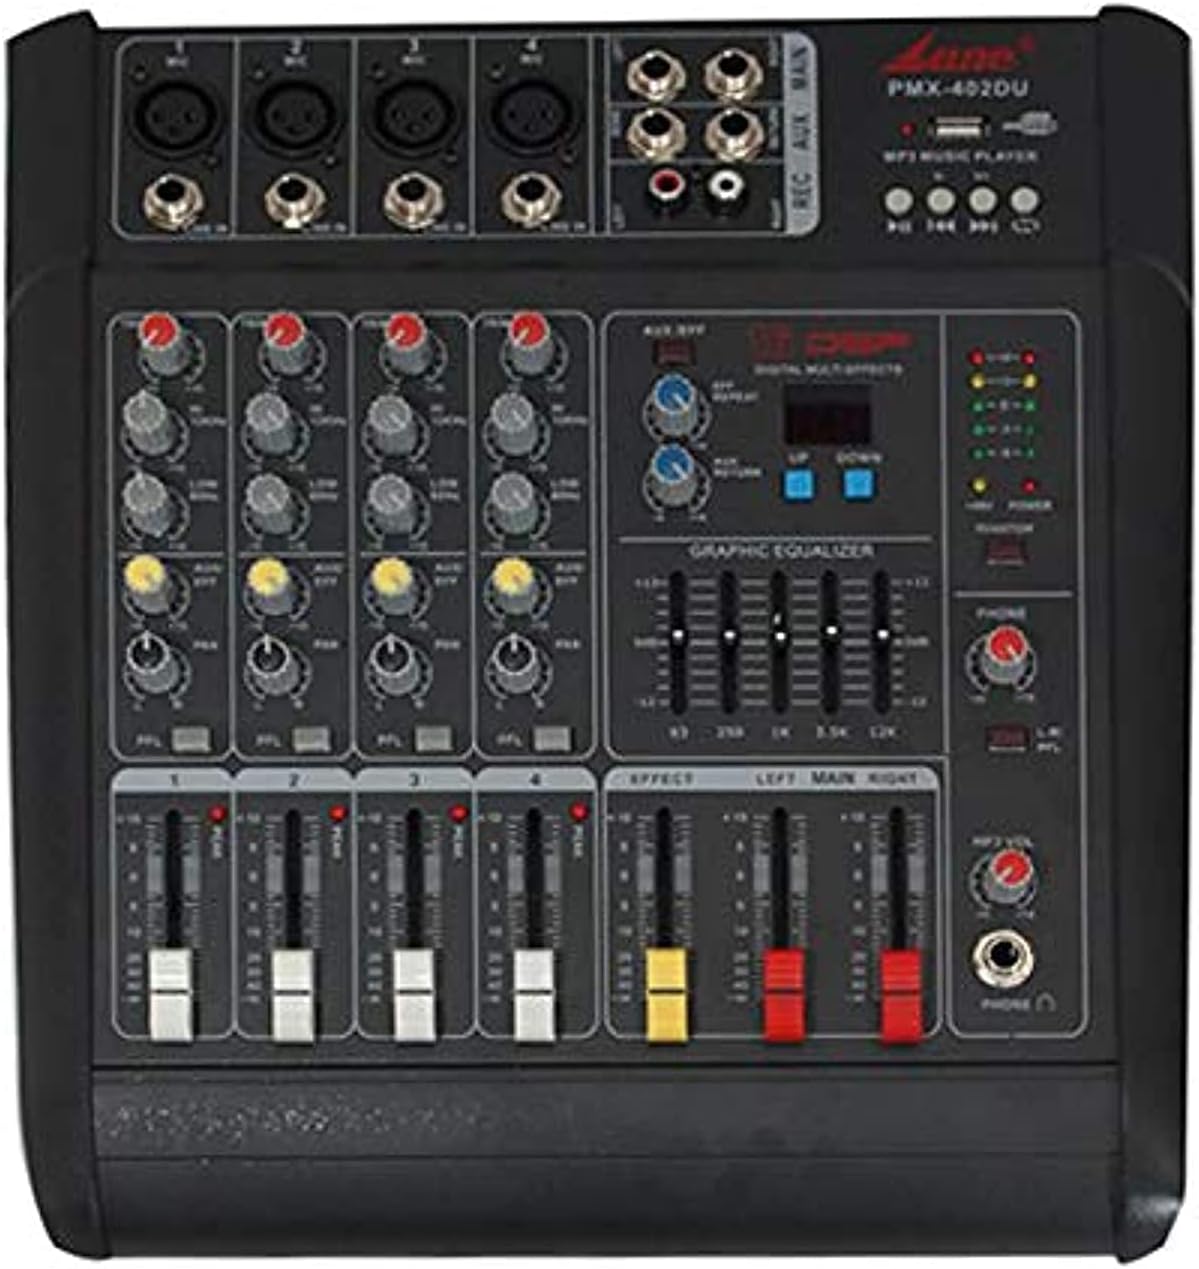
Gambar 3.1: Ngarep view of the Lane PMX-402DU Professional Stereo Power Mixer. This image displays the mixer's top surface, featuring four input channels with XLR and 1/4-inch jack inputs, gain controls, 3-band EQ, effect send, and channel faders. On the right, there are master controls for effects, a 5-band graphic equalizer, main output faders, and a USB/MP3 player section.
- XLR/TRS Combo Inputs: Kanggo mikropon utawa instrumen tingkat garis.
- Kontrol GAIN: Nyetel sensitivitas input kanggo saben saluran.
- EQ Dhuwur/Sedheng/Endhek: Equalizer 3-band kanggo mbentuk nada ing saben saluran.
- EFF Send: Ngontrol jumlah sinyal sing dikirim menyang prosesor efek internal.
- Saluran Fader: Adjusts the volume level of each individual channel.
- EFFECT Section: Controls for the built-in digital multi-effects processor.
- GRAPHIC EQUALIZER: 5-band stereo graphic equalizer for main output.
- MAIN Faders: Ngontrol volume output sakabèhé saka mixer.
- USB/MP3 Player: Interface for playing audio from USB drives.
- Output Headphone: 1/4-inch jack for monitoring.
3.2. Sambungan Panel mburi
The rear panel houses the power input and main speaker outputs.

Gambar 3.2: mburi view of the Lane PMX-402DU Professional Stereo Power Mixer. This image shows the back of the unit, featuring the main power switch, AC input with fuse holder, and two 1/4-inch jack speaker outputs labeled "RIGHT" and "LEFT". A ventilation grille is also visible.
- Ngalih daya: Nguripake utawa mateni unit.
- AC INPUT/FUSE: Power cord connection and fuse holder.
- SPEAKER OUTPUTS (LEFT/RIGHT): 1/4-inch jack outputs for connecting passive speakers.
4. Setup
4.1. Sambungan Daya
- Ensure the mixer's POWER switch is in the OFF position.
- Connect the supplied AC power cord to the AC INPUT on the rear panel of the mixer.
- Plug the other end of the power cord into a suitable grounded AC power outlet.
4.2. Sambungan Input
Connect your audio sources to the input channels on the front panel.
- Mikrofon: Use XLR cables to connect dynamic microphones to the XLR inputs.
- Instrumen/Piranti Tingkat Garis: Use 1/4-inch TS or TRS cables to connect instruments (e.g., keyboards, guitars with DI boxes) or other line-level devices (e.g., CD players, media players) to the 1/4-inch jack inputs.
4.3. Sambungan Output
Connect your passive speakers to the SPEAKER OUTPUTS on the rear panel.
- Use appropriate speaker cables with 1/4-inch TS connectors.
- Connect the LEFT output to your left speaker and the RIGHT output to your right speaker.
- Ensure the impedance of your speakers matches the mixer's output impedance (4Ω).
5. Instruksi Operasi
5.1. Powering On / Off
- Before powering on, ensure all channel faders and the MAIN faders are set to their minimum (lowest) positions.
- Flip the POWER switch on the rear panel to the ON position.
- To power off, first lower all faders, then flip the POWER switch to the OFF position.
5.2. Kontrol Saluran
- GOLEK: Adjust the GAIN control for each input channel until the signal peak indicator (if present) flashes only occasionally. This sets the optimal input level.
- EQ: Use the HIGH, MID, and LOW controls to shape the tone of each input source.
- EFF Send: Turn the EFF Send knob clockwise to send a portion of the channel's signal to the internal effects processor.
- Saluran Fader: Slowly raise the channel fader to bring the signal into the mix.
5.3. Main Output Control
After setting individual channel levels, slowly raise the MAIN faders (LEFT and RIGHT) to achieve the desired overall output volume.
5.4. Effect Processor
The mixer features a built-in digital multi-effects processor. Use the controls in the EFFECT section to select and adjust the desired effect (e.g., reverb, delay). The EFF Send knobs on individual channels determine how much of each channel's signal is processed.
5.5. Ekualiser Grafis
The 5-band graphic equalizer allows for fine-tuning the overall frequency response of the main mix. Adjust the sliders to boost or cut specific frequency bands to suit your acoustic environment or preference.
5.6. USB/MP3 Player
Lebokake USB flash drive sing ngemot audio MP3 files into the USB port. Use the controls in the USB/MP3 Player section to play, pause, skip tracks, and adjust the volume of the playback.
6. Pangopènan
- Reresik: Disconnect the power before cleaning. Use a soft, dry cloth to wipe the exterior of the mixer. Do not use liquid cleaners or aerosols.
- Panyimpenan: Yen ora digunakake sajrone wektu sing suwe, simpen mixer ing panggonan sing adhem lan garing, adoh saka sinar srengenge langsung lan suhu sing ekstrem. Tutup unit supaya ora kena bledug.
- Penggantian sekring: If the unit does not power on, check the fuse located in the AC INPUT/FUSE holder on the rear panel. Replace with a fuse of the same type and rating only.
7. Ngatasi masalah
| Masalah | Kemungkinan Penyebab | Solusi |
|---|---|---|
| Ora ana daya | Power cord not connected; Power switch off; Blown fuse | Check power cord connection; Ensure power switch is ON; Replace fuse with correct type and rating. |
| Ora ana swara saka speaker | Speaker cables not connected; Main faders down; Channel faders down; GAIN too low; Speakers not powered (if active) | Check speaker connections; Raise MAIN faders; Raise channel faders; Adjust GAIN; Ensure active speakers are powered on. |
| Swara kleru | GAIN too high; Channel fader too high; MAIN faders too high; Incorrect impedance match | Reduce GAIN; Lower channel faders; Lower MAIN faders; Verify speaker impedance (4Ω). |
| No effect sound | EFF Send knob down; Effect level down; Effect not selected | Increase EFF Send on channel; Adjust effect level in EFFECT section; Select an effect program. |
8. Spesifikasi
| Model | PMX-402DU |
| Daya Output | 150W + 150W (at 4Ω) |
| Konsumsi Daya | 150W |
| Distorsi Harmonik Total (T.H.D) | 0.03% (1kHz full power) |
| Jumlah Saluran | 4 |
| Ukuran (L x W x H) | 370 x 345 x 175 mm |
| Bobot Barang | 11 kg |
| Sumber Daya | Kabel Listrik Kab |
9. Warranty lan Dhukungan
For warranty information or technical support, please refer to the documentation provided at the time of purchase or contact your authorized Lane dealer. Keep your proof of purchase for warranty claims.