
1. Pambuka
Thank you for choosing the CREATE SILKAIR CONNECT 3-in-1 Mobile Air Conditioner. This versatile appliance is designed to provide cooling, dehumidification, and fan functions for your living space. With its Wi-Fi connectivity, you can conveniently control the unit via a mobile application. Please read this manual thoroughly before operation to ensure safe and efficient use.
Model: 64274_145198
Merk: NYIPTA
2. Informasi Safety
Tansah tindakake pancegahan safety dhasar nalika nggunakake piranti listrik kanggo nyuda resiko geni, kejut listrik, lan ciloko.
- Priksa manawa sumber daya cocog karo voltage kasebut ing label rating.
- Aja operate unit kanthi kabel utawa plug sing rusak.
- Supaya unit adoh saka sumber panas lan langsung suryo srengenge.
- Aja ngalangi inlet utawa outlet udara.
- Tansah copot piranti saka colokan listrik sadurunge ngresiki utawa ngrawat.
- Piranti iki nggunakake refrigerant R290. Aja puncture sirkuit refrigerant.
- Ngawasi bocah-bocah lan priksa manawa ora dolanan piranti kasebut.
3. Isi Paket
Carefully unpack your air conditioner and check that all items are present and in good condition.
- CREATE SILKAIR CONNECT Mobile Air Conditioner Unit
- Selang knalpot
- Window Sealing Kit (Adjustable window slider, hose adapter)
- Remote Control
- Manual pangguna

Figure 1: The CREATE SILKAIR CONNECT Mobile Air Conditioner unit shown alongside a smartphone displaying its control application interface.
4. Produk Liwatview
4.1 Panel Kontrol

Figure 2: Close-up of the top-mounted control panel, featuring an LED display and touch-sensitive buttons for various functions such as power, mode selection, fan speed, and timer.
4.2 Komponen lan Dimensi
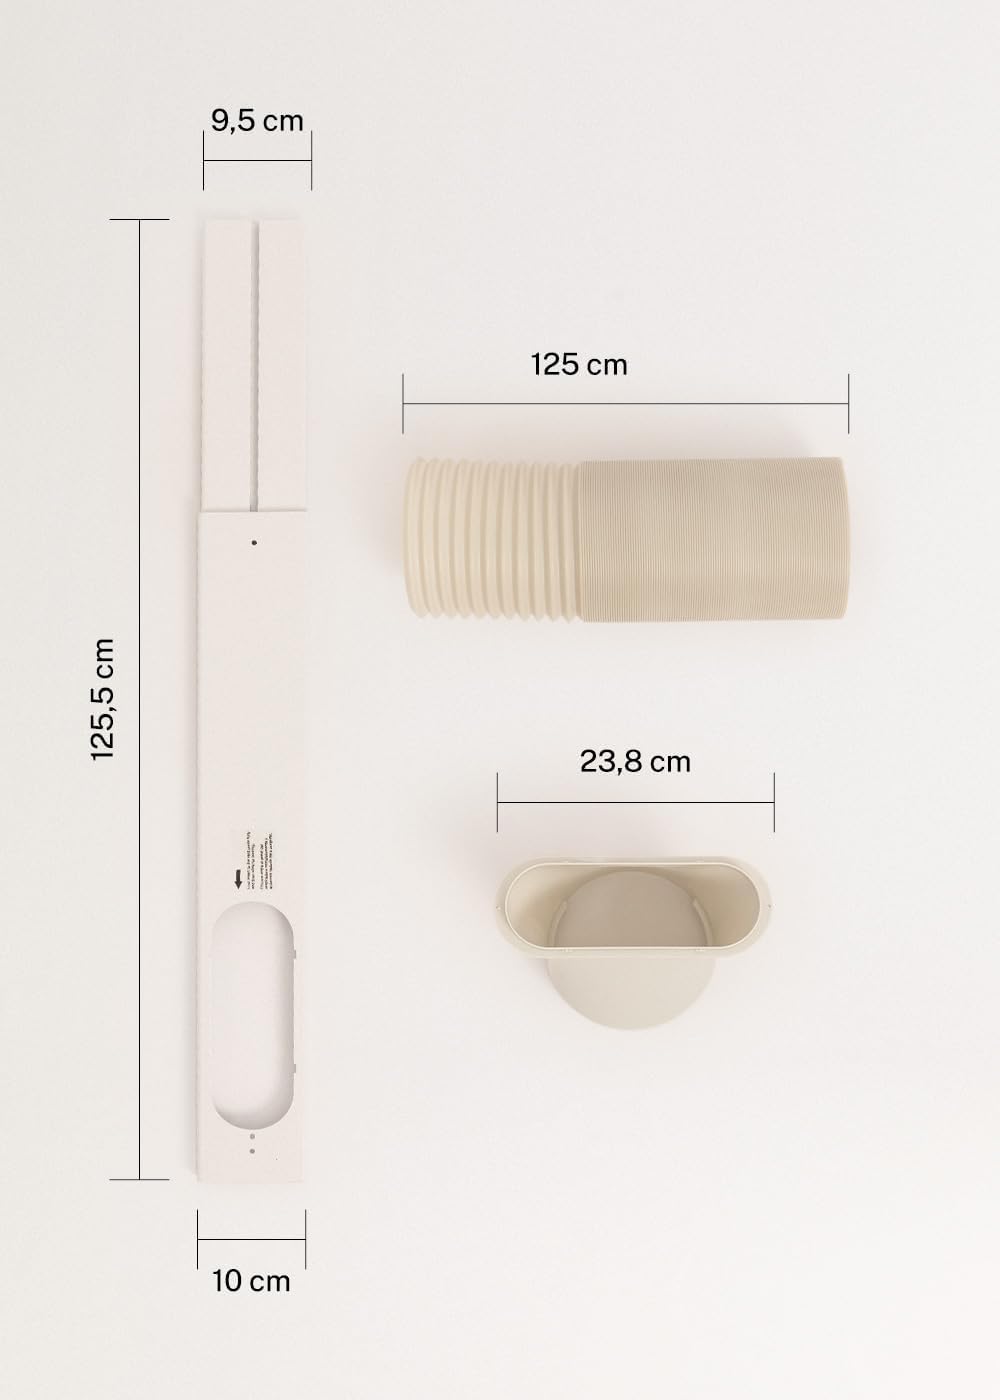
Figure 3: Detailed diagram illustrating the dimensions of the window sealing plate (125.5 cm length, 10 cm width, 9.5 cm adjustable width) and the exhaust hose (125 cm length) with its adapter (23.8 cm diameter).
5. Persiyapan lan Instalasi
Proper installation is crucial for the efficient operation of your mobile air conditioner.
5.1 Posisi Unit
- Selehake unit ing permukaan sing rata lan stabil.
- Priksa manawa ana paling ora 30 cm ruang ing sekitar unit supaya aliran udarane lancar.
- Position the unit near a window or opening for the exhaust hose.
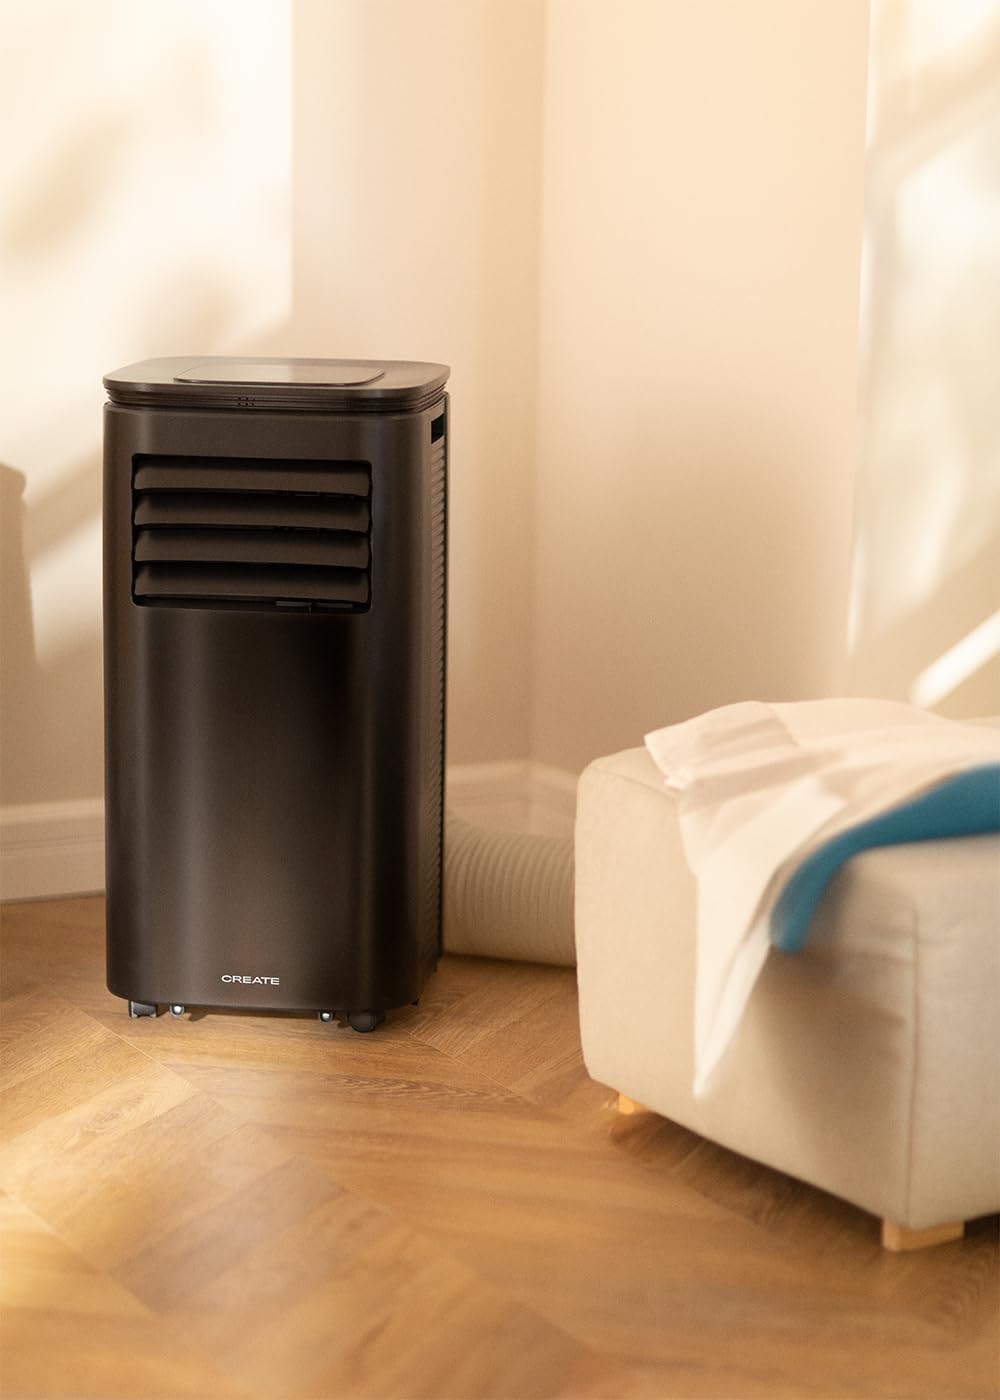
Figure 4: The air conditioner unit positioned in a room, demonstrating the typical setup with the exhaust hose directed towards a window for heat expulsion.
5.2 Installing the Exhaust Hose and Window Kit
- Pasang adaptor selang ing salah siji ujung selang knalpot.
- Sambungake pucuk liyane saka selang knalpot menyang saluran udara ing mburi unit.
- Install the adjustable window sealing kit in your window opening. Extend it to fit the window frame.
- Insert the hose adapter into the opening of the window sealing kit.

Figure 5: Illustrates the secure connection of the flexible exhaust hose to the designated port at the rear of the air conditioning unit.
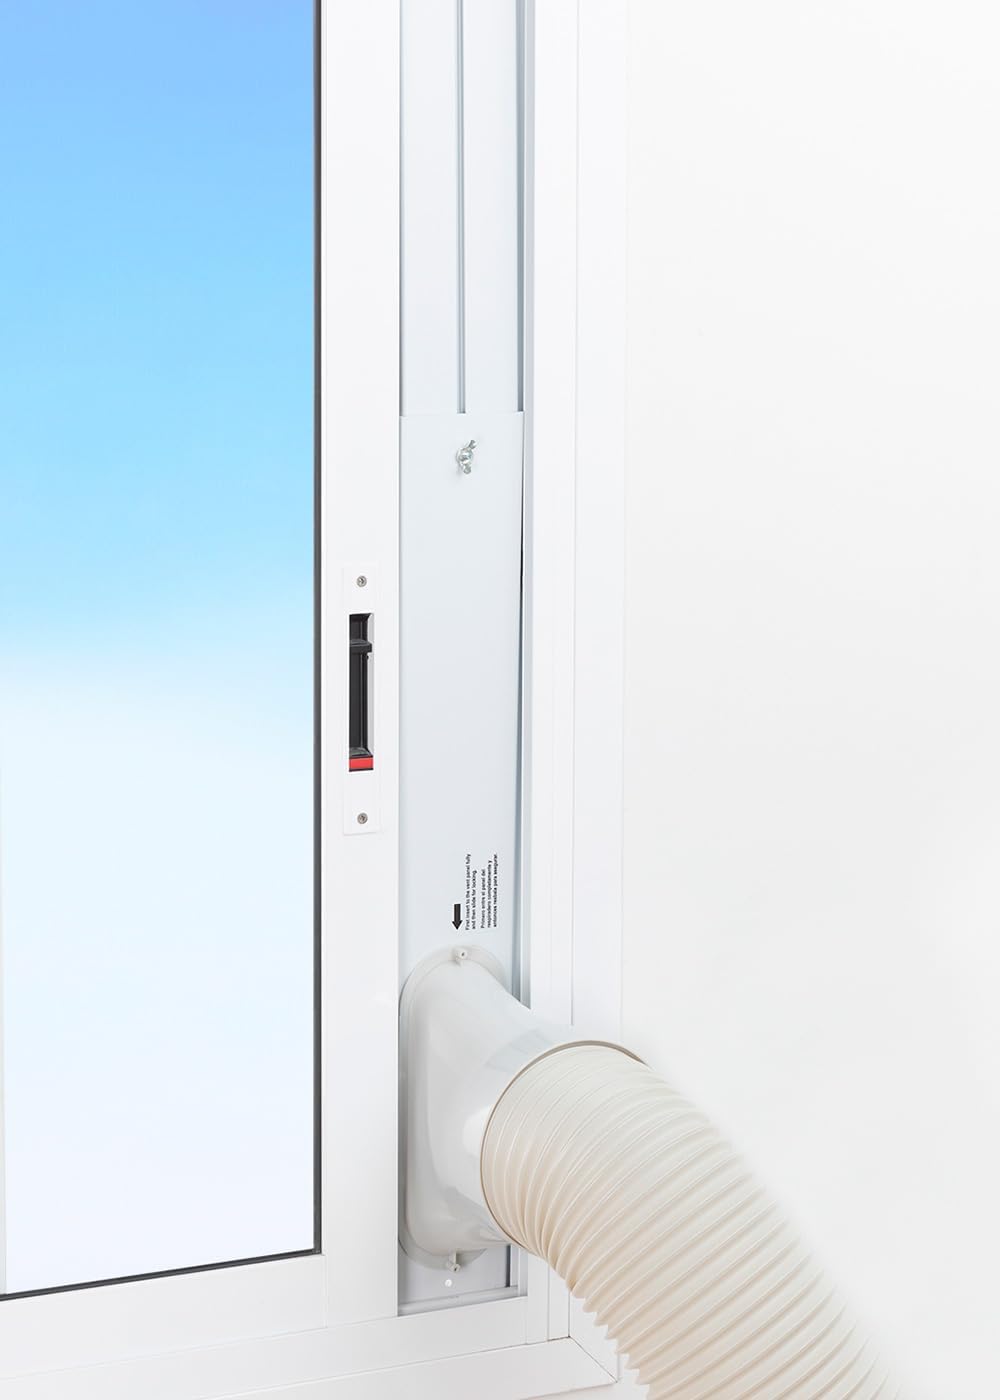
Figure 6: The window sealing kit is shown properly installed in a window frame, with the exhaust hose securely fitted into the kit's opening to vent hot air outside.
6. Instruksi Operasi
6.1 Nggunakake Panel Kontrol
The control panel on top of the unit allows direct operation.
- Tombol daya: Pencet kanggo nguripake utawa mateni unit.
- Tombol Mode: Owah-owahan ing mode Pendingin, Kipas, lan Dehumidifier.
- Tombol Kacepetan Kipas: Adjust fan speed (Low, High).
- Tombol Suhu (+/-): Adjust desired temperature in Cooling mode.
- Tombol Timer: Setel wektu urip otomatis utawa mati otomatis (nganti 24 jam).
- Tombol Mode Turu: Activates a quieter operation mode for nighttime use.
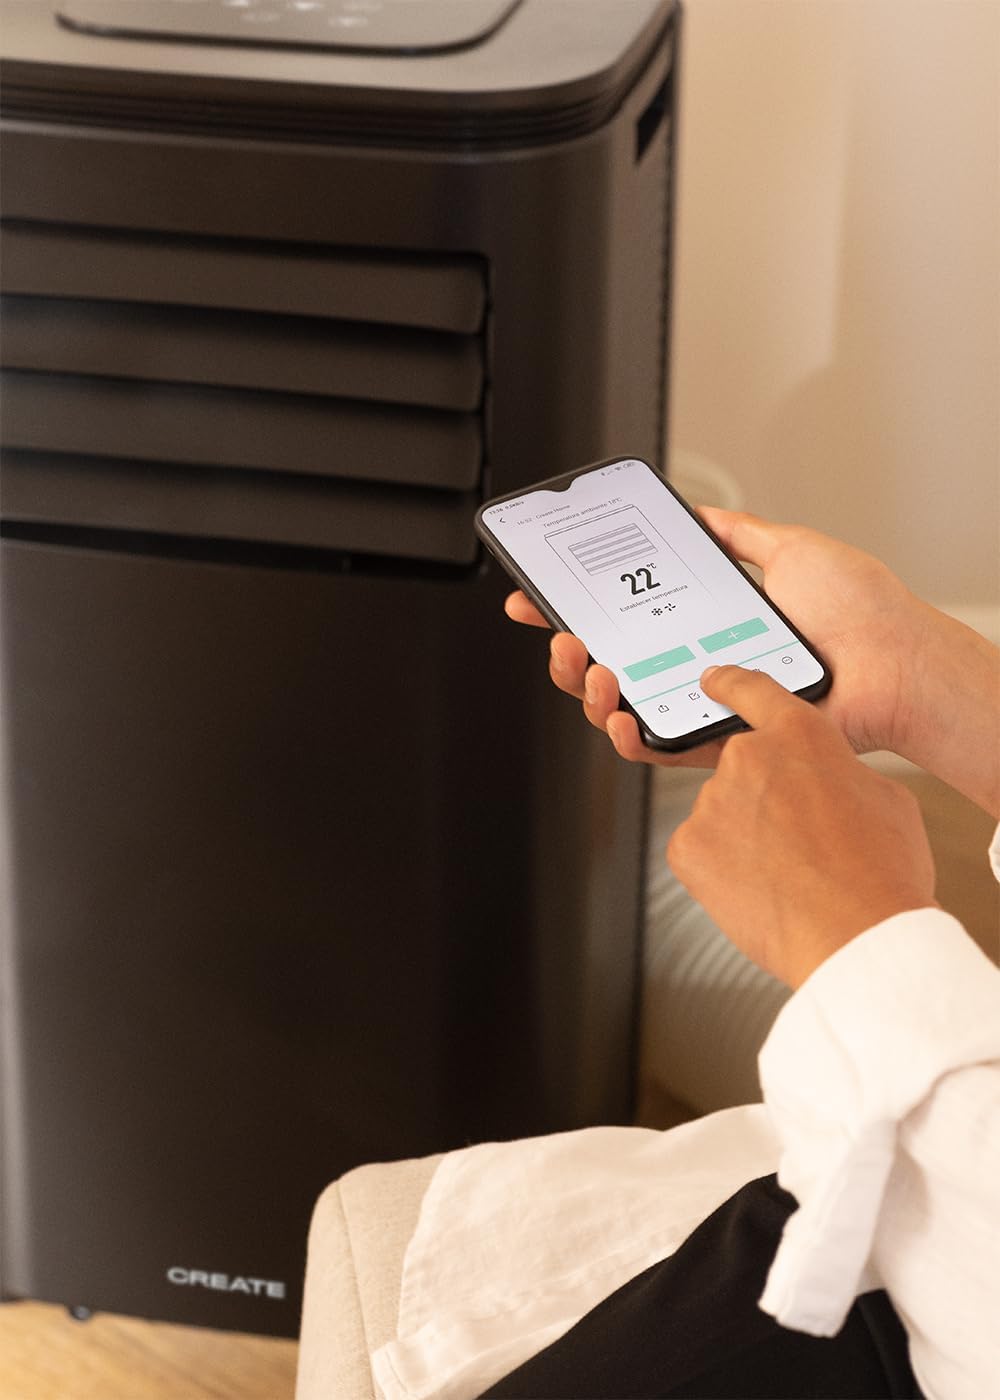
Figure 7: A user's hand interacting with the touch-sensitive control panel located on the top surface of the air conditioner, demonstrating direct manual operation.
6.2 Nggunakake Remote Control
The remote control provides convenient operation from a distance.

Figure 8: A hand holding the dedicated remote control for the air conditioner, illustrating its use for convenient operation from a distance.
6.3 Wi-Fi lan Kontrol Aplikasi
Download the CREATE Home app from your smartphone's app store. Follow the in-app instructions to connect your air conditioner to your home Wi-Fi network. Once connected, you can control all functions of the unit from your smartphone, including mode selection, temperature adjustment, fan speed, and timer settings.
Figure 9: A user interacting with the mobile application on a smartphone to remotely control the air conditioner, showcasing the Wi-Fi connectivity feature.
7. Pangopènan
Pangopènan rutin njamin kinerja sing optimal lan ndawakake umur unit sampeyan.
7.1 Reresik Filter Udara
Filter udara kudu diresiki saben rong minggu utawa luwih kerep gumantung saka panggunaan lan kualitas udara.
- Pateni unit lan copot saka stopkontak.
- Golekana panel filter udara ing mburi unit.
- Copot saringan alon-alon.
- Clean the filter with warm, soapy water or a vacuum cleaner. Rinse thoroughly and allow it to air dry completely before reinserting.

Figure 10: Demonstrates the process of removing the air filter from the rear of the air conditioner unit for cleaning or replacement.
7.2 Banyu ngilekake banyu
In Dehumidifier mode or high humidity conditions, the internal water tank may fill up. The unit will stop operating when the tank is full. Drain the water from the drainage port at the bottom rear of the unit.
8. Ngatasi masalah
| Masalah | Kemungkinan Penyebab | Solusi |
|---|---|---|
| Unit ora urip | Ora ana daya; kabel daya ora kepasang ing; Tangki banyu kebak. | Check power outlet; Plug in power cord; Drain water tank. |
| Unit ora cooling efektif | Filter udara reged; Selang knalpot ora dipasang kanthi bener; Kamar gedhe banget; Lawang / jendhela mbukak. | Clean air filter; Ensure hose is sealed; Use in recommended room size (14-25 m²); Close doors/windows. |
| Swara banter | Unit ora ana ing lumahing rata; Ana alangan ing kipas. | Place on flat surface; Check for obstructions. |
| Masalah sambungan Wi-Fi | Sandi Wi-Fi salah; Router kelewat adoh; Masalah aplikasi. | Verify password; Move unit closer to router; Restart app/unit. |
9. Spesifikasi
| Fitur | Spesifikasi |
|---|---|
| Nomer Model | 64274_145198 |
| Kapasitas Cooling | 9000 BTU / 2270 Watt |
| Kapasitas Dehumidification | 24 Liter/Dina |
| Aliran udara | Nganti 350 m³/jam |
| Dianjurake Ukuran Kamar | 14-25 m² |
| Tingkat Noise | 65 dB |
| Refrigerant | R290 (ECO-friendly) |
| Voltage | 240 volt |
| Wattage | 2600 Watt |
| Ukuran (L x W x H) | 35.5 x 36.5 x 71.3 cm |
| Bahan | ABS |
| Kelas Efisiensi Energi | A |

Figure 11: The energy efficiency label for the CREATE SILKAIR CONNECT, indicating an A-class energy rating, 2.6 kW cooling capacity, and a noise level of 65 dB. More details can be found at eprel.ec.europa.eu/qr/1580267.
10. Warranty lan Dhukungan
For warranty information and technical support, please refer to the warranty card included with your product or visit the official CREATE websitus. Simpen kuitansi tuku minangka bukti tuku.
Produsen: NYIPTA
Kontak: Refer to CREATE's official support channels.